How to Merge CAX Files
This section provides a step by step procedure to merge CAX files.
Steps to merge CAX files
Open VCollab Pro application.
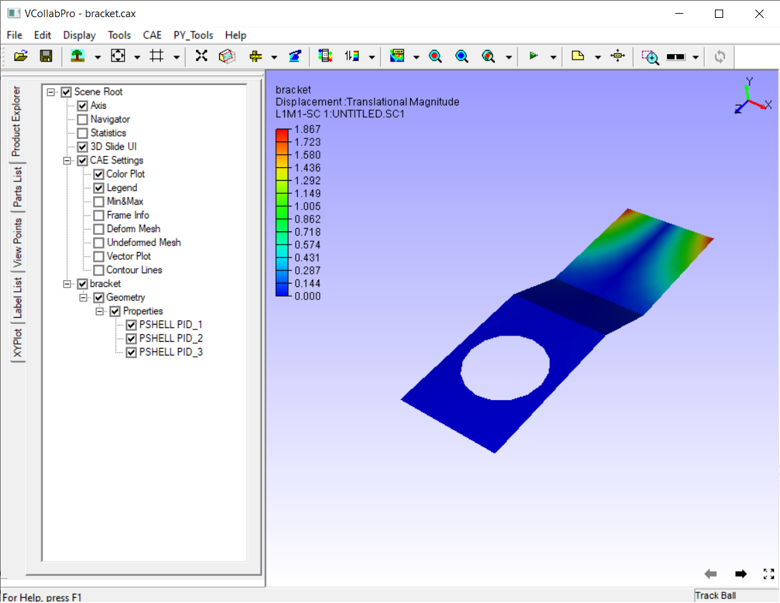
Load a CAX file.
Click File | Merge.
A file browser dialog opens up. Select a CAX file to be merged with the current scene.
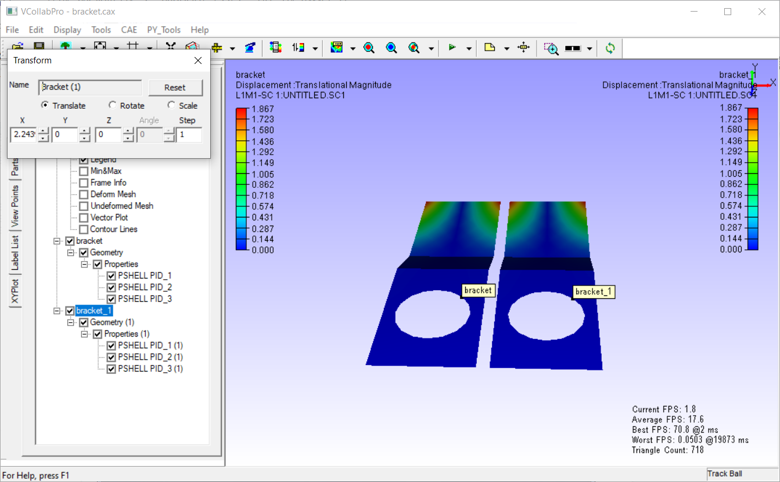
The image below depicts two bracket CAX files that are merged.
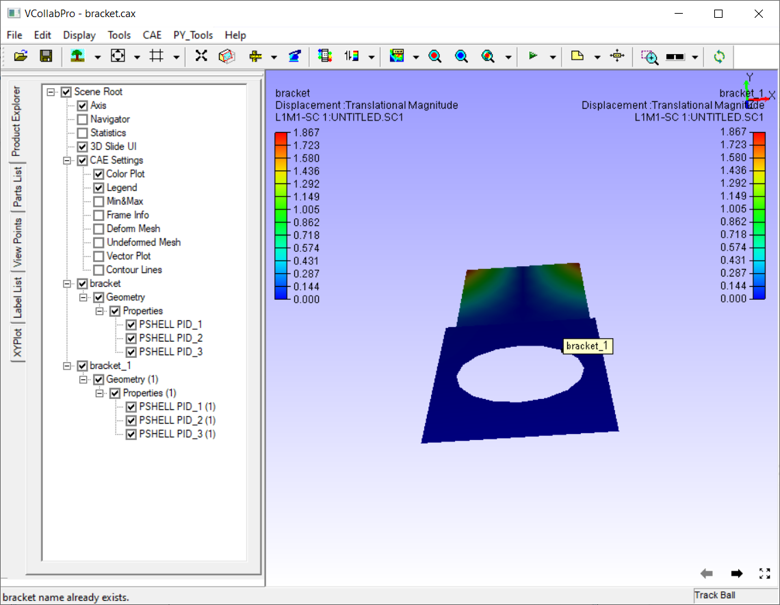
Models are identified with their file name or model name labels attached to them.
If both the models are of the same mesh, they overlap each other.
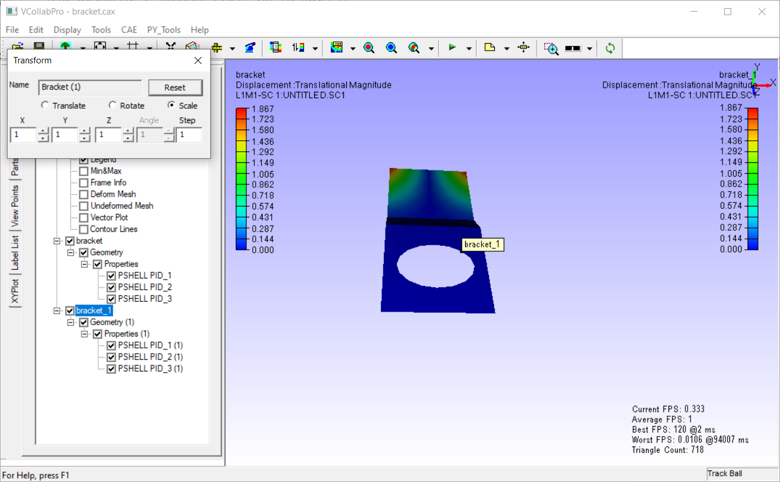
Transform option available in the product tree or
can be used to overcome this overlap issue.
Open Product Explorer and view the product tree.
Right click on the merged model to open the context menu as shown below.
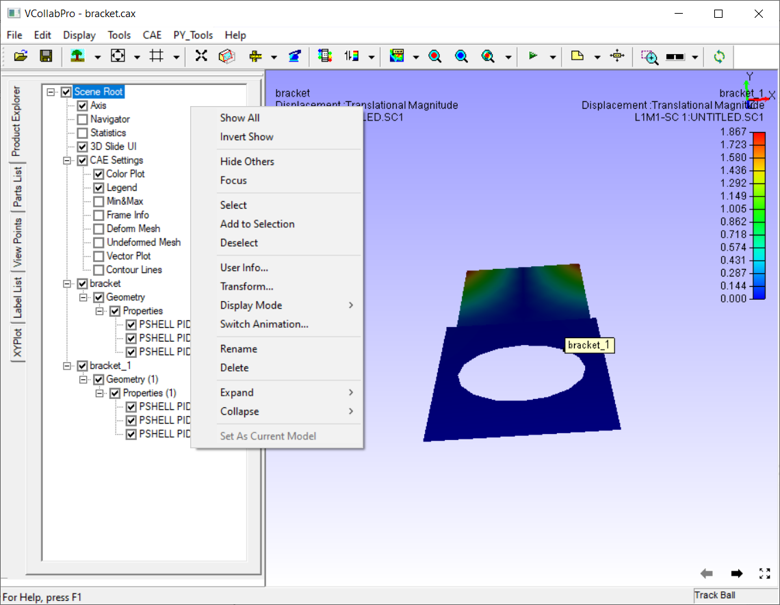
Select Transform to open the Transform panel
Click Translate.
Either enter some units or use the increment arrows in x, y, and z axes.
Select Rotate to rotate the model.
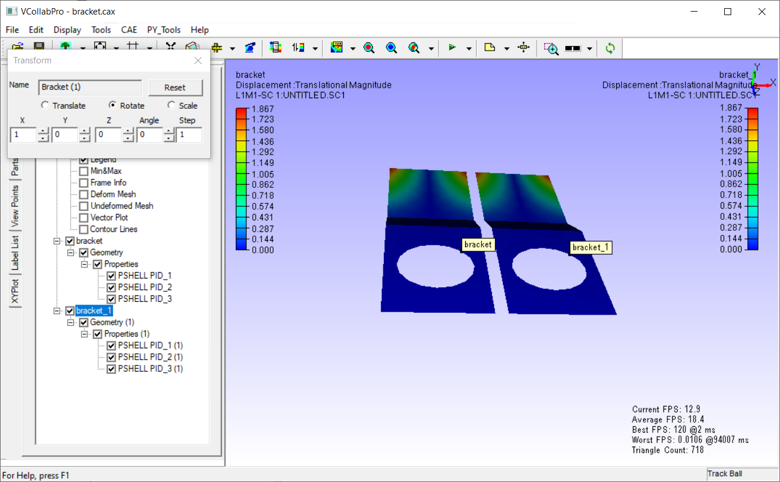
Enter x, y and z axis components in the respective boxes to define the axis of rotation. Enter angle for rotation.
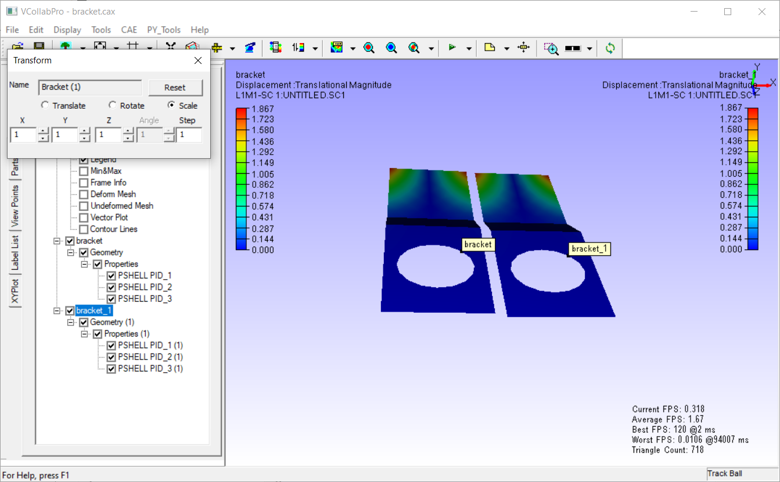
Select Scale to scale the model if necessary. Enter the scale values for each axis.
E.g., Scale is applied on the Y axis with 2 units in the below image.
Click the Reset option to clear all these transformations.