How to Export Viewpoints into HTML Files?
This section explains how users can export viewpoints into html files.
Export HTML Panel
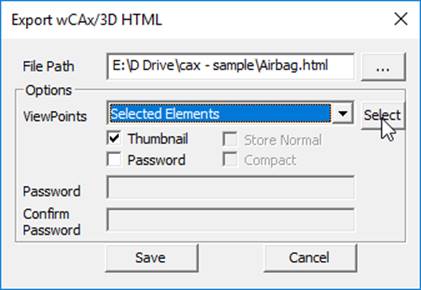
The various fields and options available in the Export wCAX/3D HTML panel are explained below
File Path |
Output wCAX / 3D HTML file path. |
Viewpoints |
Allows user to select following viewpoint export options,
|
Thumbnail |
Stores thumbnail images for each viewpoint. |
Password |
Enables password protection for wCAX file. |
Store Normal |
Exports vertex normals with model. It may increase the file size. |
Compact |
Filters duplicated data and exports. This may take significant time but will result in reduced file size. |
Save |
Saves wCAX / 3D HTML file. |
Selected Elements
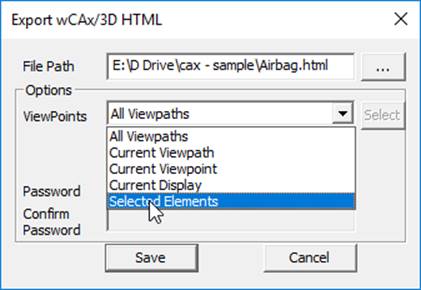
Users can select a region and clip the elements outside the region using Selected Elements option from the Viewpoints drop down menu. They can further clip the model by moving front and back planes. Now the bounded elements with current orientation can be exported into wCAX / 3D HTML file.
Note:
Deletion of results will affect existing viewpoints. These affected viewpoints will be ignored while writing into wCAX/HTML.
Animation state will be ignored in case of Current Display option.
Some internet browsers may not support TIFF image format. VCollab recommends png,jpeg and gif formats for background if required.
Steps to Export Viewpoints in HTML FIles
Click File | Export option.
Select wCAX/3D HTML… to open the below panel
Enter the output file path, or select folder using file browser button. Provide file name and click OK.
Click Viewpoints drop down list.
Select an export option.
Select the Thumbnail option to display images for each viewpoint in HTML.
The Thumbnail option will disabled for the Current Display option.
Click the Password checkbox if file protection is required.
Provide password and confirm it by retyping.
Click Save to export into 3D HTML data.
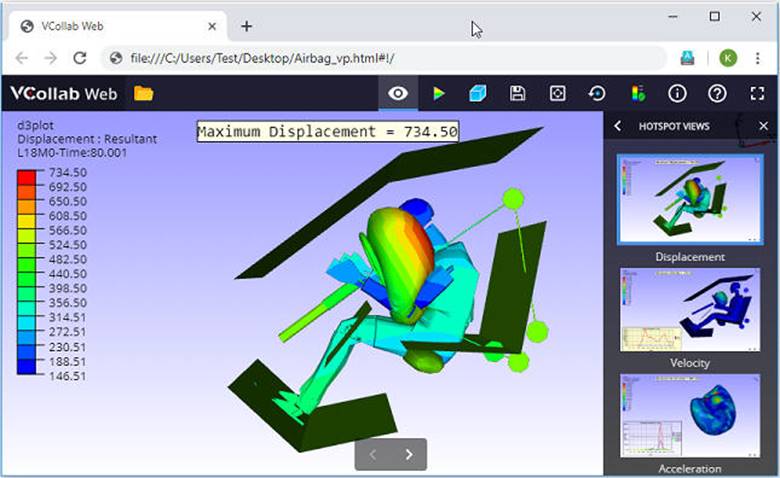
Screenshot of sample 3D HTML file with viewpoint thumbnail images
How to export selected elements?
Click File | Export
Select wCAx / 3D HTML option.
Provide output WCAX or HTML file path using file browser dialog or enter the file path.
Click Selected Elements from the drop down list.
Click on the Select button which is enabled to define the rectangular region in the viewer.
Click and drag to define a rectangular region of interest in the viewer.
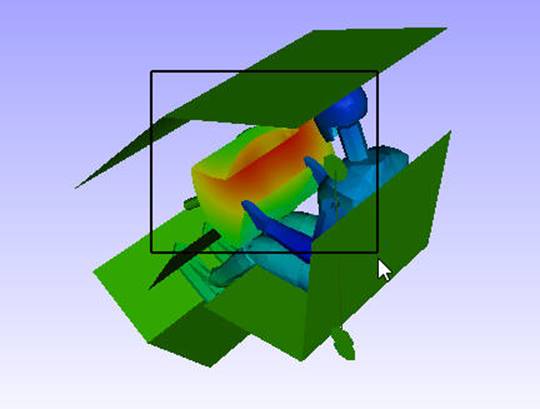
Elements outside the region will be clipped by the frustum (rectangle).
Orient the model to visualize the depth of frustum.

Move front and back planes by clicking on them and dragging
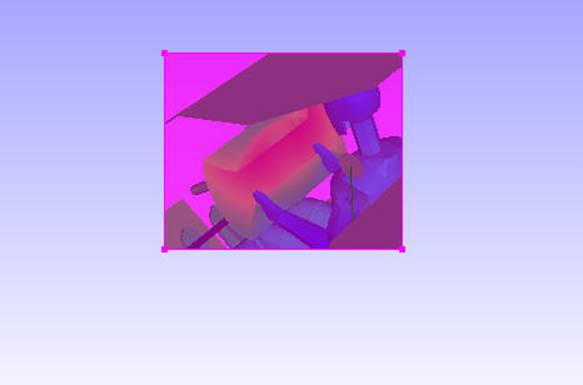
Enable Thumbnail option to capture the region selection as thumbnail image.
Click Save.