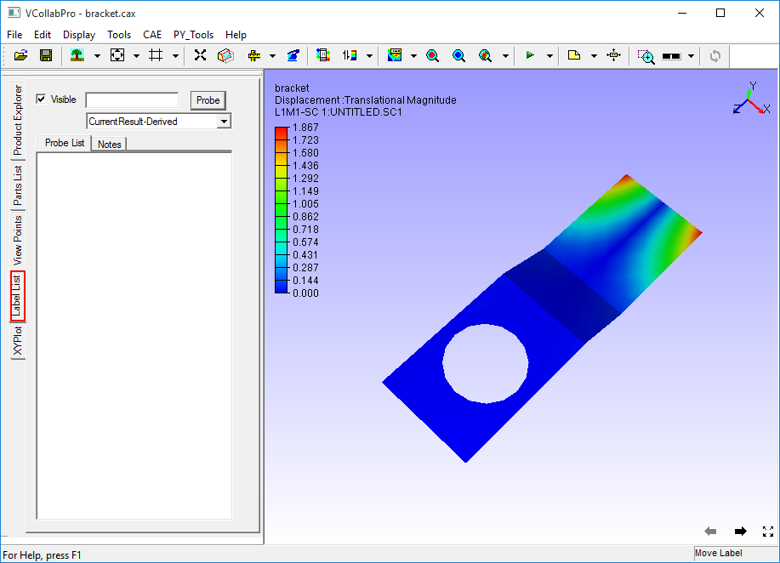
Label List
Label list panel displays the list of probe labels and user notes. Users can view, edit or delete the labels and even fit the labels inside the viewer. This tab can be accessed from the left span of VCollab Pro.
Label List Panel
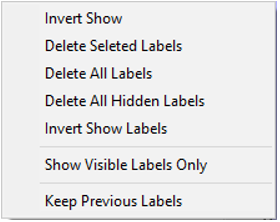
Context Menu
On right clicking a node in the Label List, the context menu appears as shown below
The controls available in the Label List panel are explained in the table below.
Visible
Enables or disables visibility of the selected items in the label list
Probe
Probes results for node id entered in ID edit box
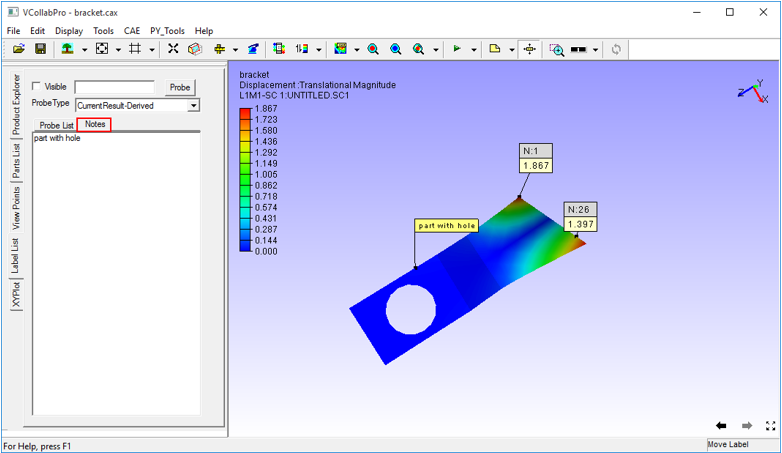
Probe List
Displays list of all probed labels
Notes
Displays list of all user notes (annotations)
Context Menu Options
Invert Show
Toggles in displaying between visible and hidden labels
Delete Selected Labels
Deletes selected labels from the panel
Delete All Labels
Deletes all labels
Delete All Hidden Labels
Deletes all hidden labels
Invert Show Labels
Toggles labels visibility
Show Visible labels only
Shows only those labels whose attached geometry position is visible.
Keep Previous Labels
Keeps previous labels visible. By default, they disappear.
Steps to view Label List
Click Edit | Label List Or Open Label List tab from the left span of VCollab Pro.
Click Probe List to view probed labels as below.
Click Notes to view the list of notes.

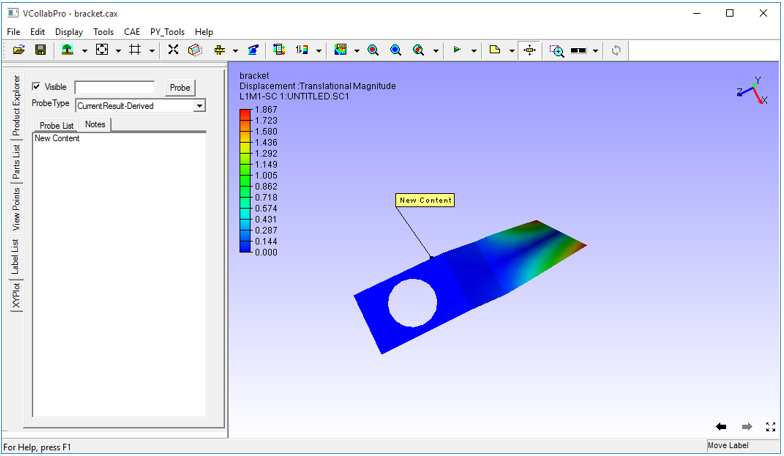
Steps to add and edit Notes
To Add Note,
Click Tools | Add Notes to open the Add Note dialog box.
Enter a note in the edit box and click OK
Click a point in the viewer to attach the note to it.
Click a point on the part to which label needs to be attached.
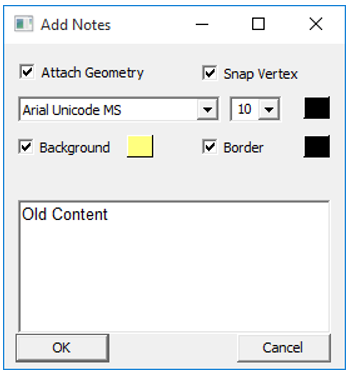
To Edit a note,
Open Label List panel
Go to Notes tab in the panel.
Double click the note to be edited. The Edit Notes dialog box with open. Edit the note with new content and click OK
After editing, the new content is seen in the note


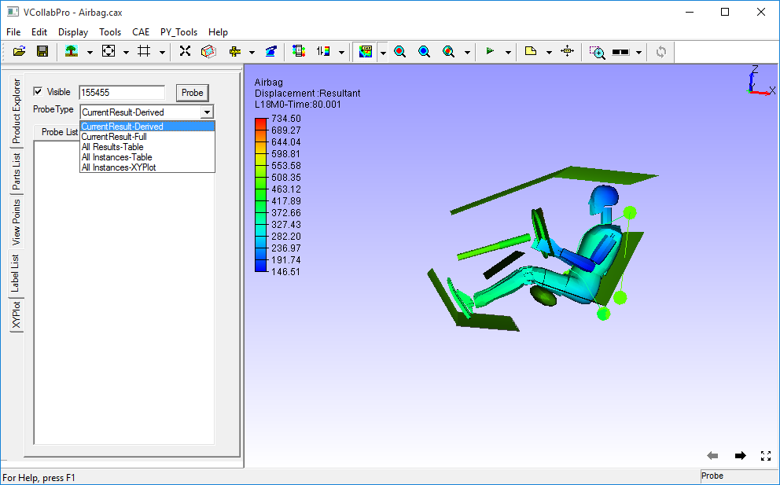
Steps to probe results for known IDs
Enter a known ID in the ID edit box.
Select a probe type from the drop down menu.
Click Probe to probe results.
A message box will appear for wrong node ID.
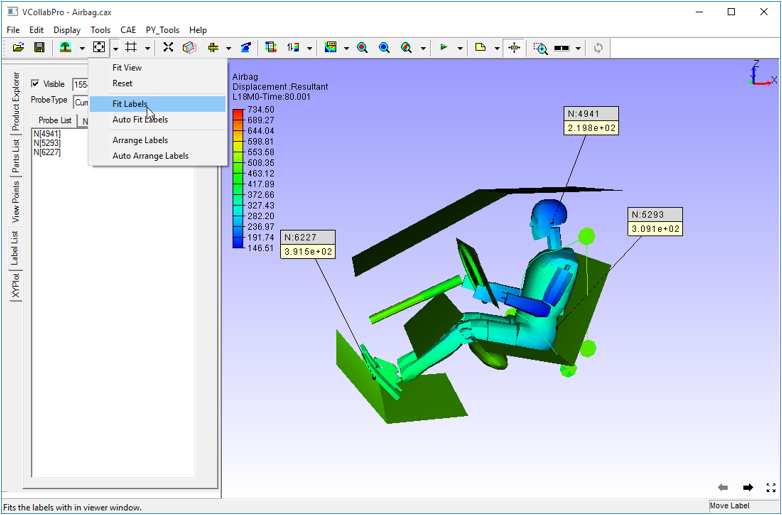
Steps to Fit labels inside viewer
There are three options to fit the labels inside the viewer,
Fit the labels manually: This method can be used to fit the labels into the viewport, whenever it is necessary.
Click Fit Labels option in “Tools | Labels/Notes”
The labels are then Fit and appear in the scene (for only one time)
Auto Fit the labels
By default this option is unchecked. If it is checked, all labels automatically come into the scene and will not move beyond the view port.
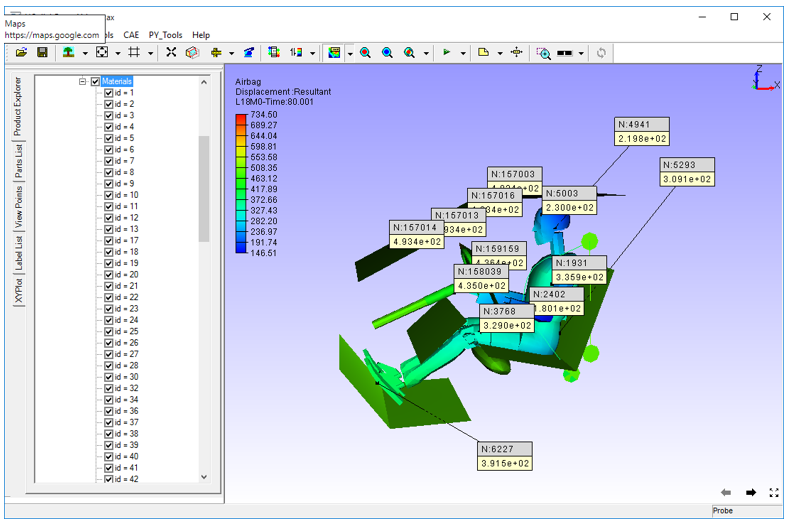
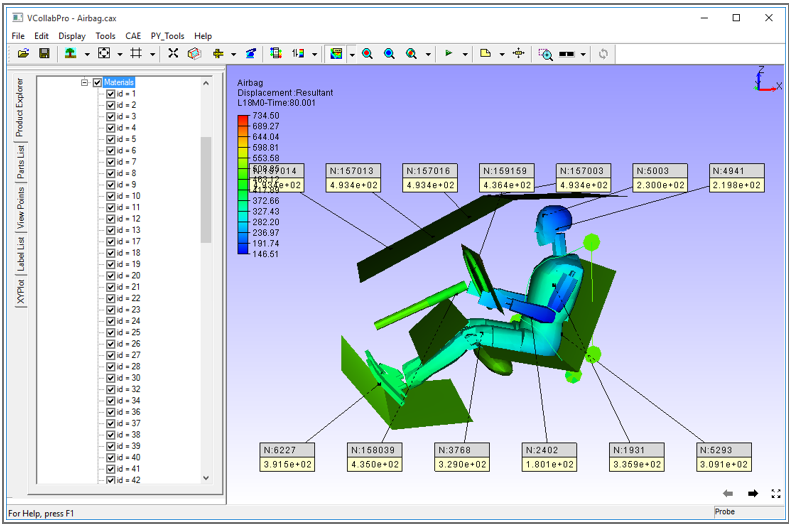
Arrange Labels
If there are many labels, they overlap each other and become difficult to read
To avoid labels overlapping, Use Arrange labels option.
It lists half of labels above the model and other half below the model in a readable order.
The following images show labels before and after the ‘Arrange Labels’ option.
Before
After