Setting the GPU Preference for VCollab Applications on Windows
Many laptops and some desktops have two graphics processors: an integrated GPU that uses less power, and a dedicated (discrete) GPU that gives better performance. By default, Windows may run an application on the integrated GPU. For the best rendering performance with large CAE models, run VCollab applications on the dedicated GPU.
This page explains how to:
Add a VCollab application to the list in System > Display > Graphics.
Select the application and set its GPU preference.
Note
These steps apply to Windows 10 (version 1803 and later) and Windows 11. The screenshots are from Windows 10. The names of some buttons and menus differ slightly in Windows 11. If the dedicated GPU is not shown as an option, update the graphics driver from the GPU vendor's website.
Step 1: Open the Graphics settings
Press Windows + I to open Settings.
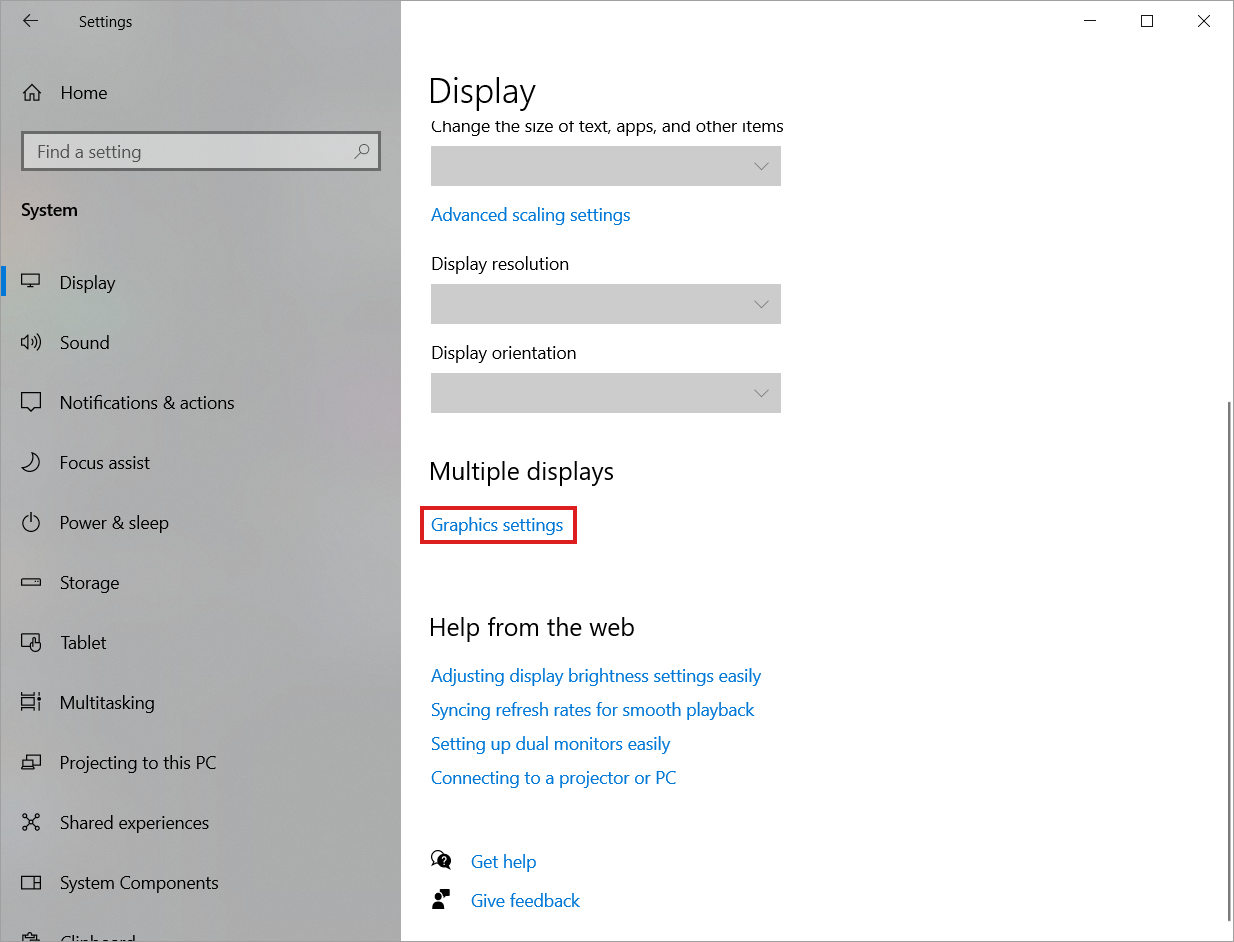
Go to System > Display.
Scroll down and click Graphics settings (in Windows 11, click Graphics).
Step 2: Add the application to the list
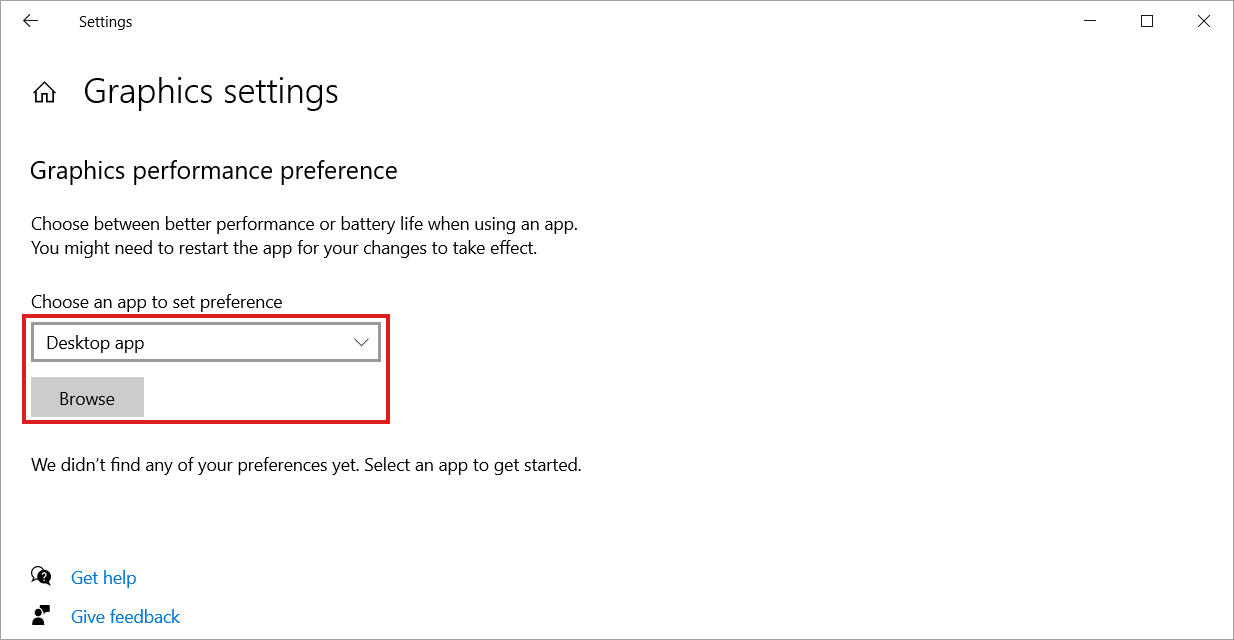
Under Graphics performance preference (in Windows 11, under Custom options for apps), make sure Desktop app is selected in the drop-down list.
Click Browse.
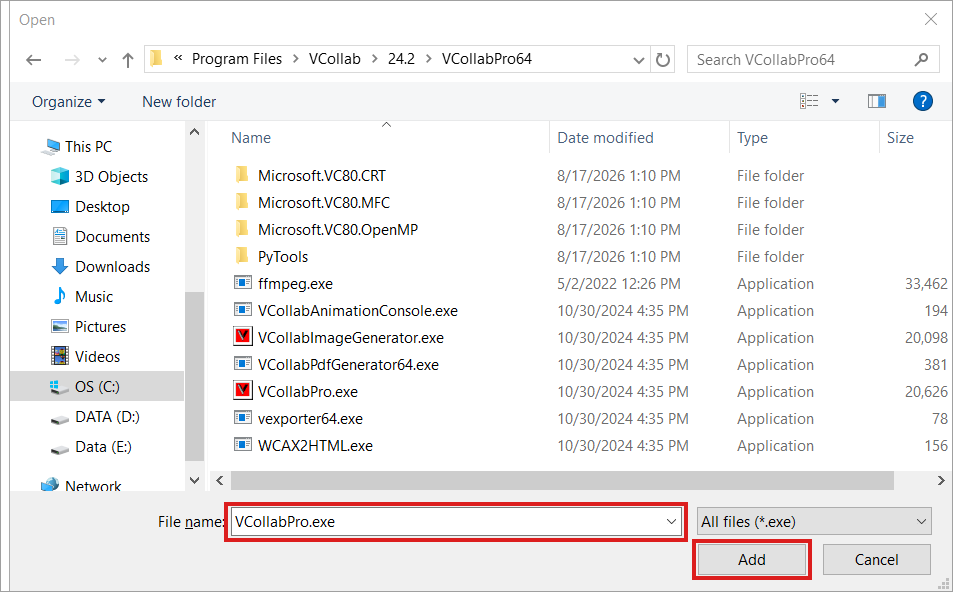
Go to the VCollab installation folder and select the application's executable file, for example
C:\Program Files\VCollab\24.2\VCollabPro64\VCollabPro.exe.Click Add.
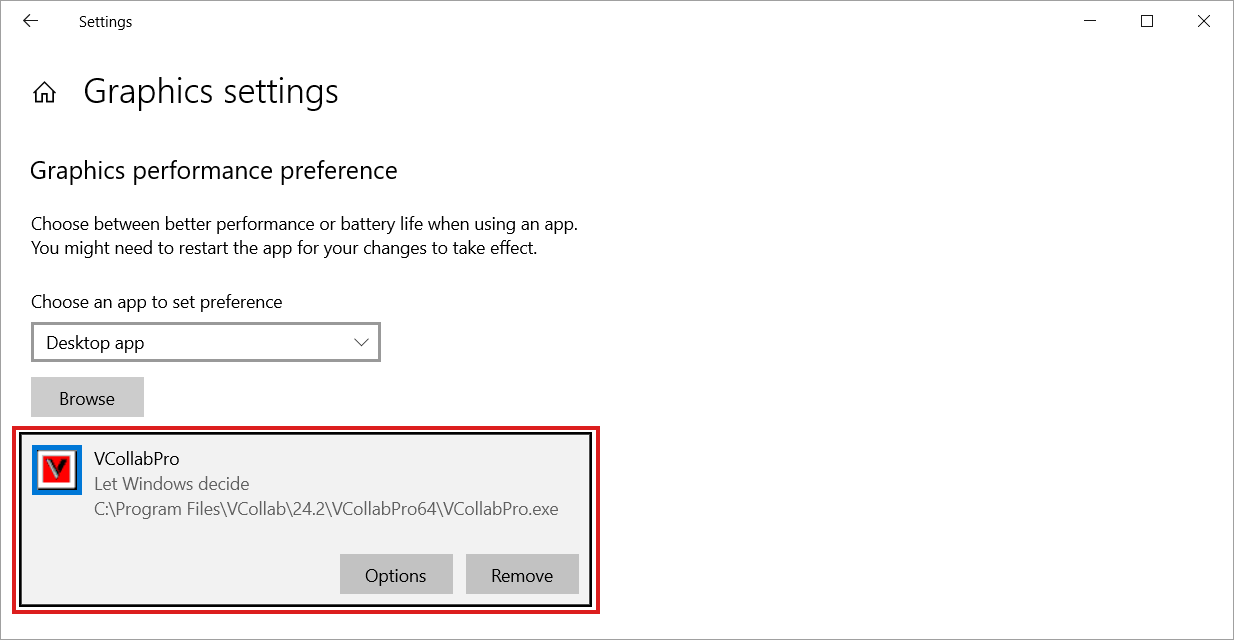
The application now appears in the list of apps. Its preference is initially set to Let Windows decide.
Step 3: Select the application and set its GPU preference
In the list of apps, click the VCollab application that you added.
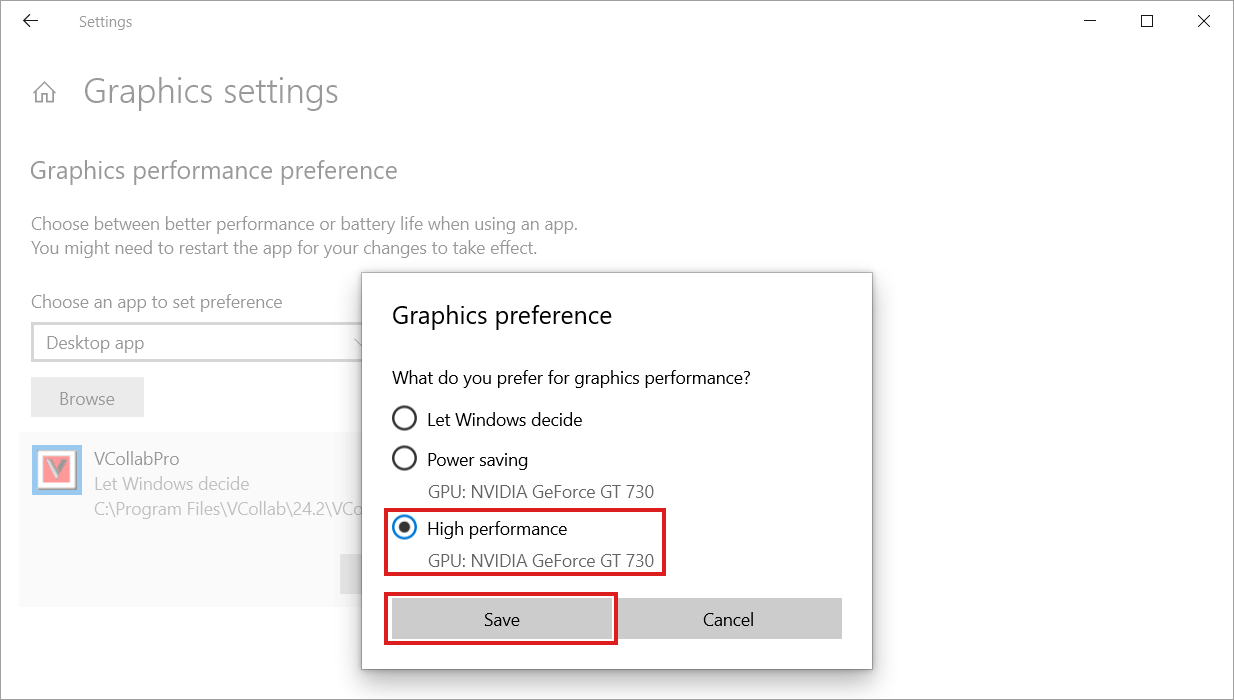
Click Options. The Graphics preference dialog box opens.
Select one of the following options:
Let Windows decide: Windows chooses the GPU.
Power saving: uses the integrated GPU, which uses less power.
High performance: uses the dedicated GPU. This option is recommended for VCollab applications.
The name of the GPU that each option uses is shown below the option.
Click Save.
The list of apps now shows the selected preference for the application.
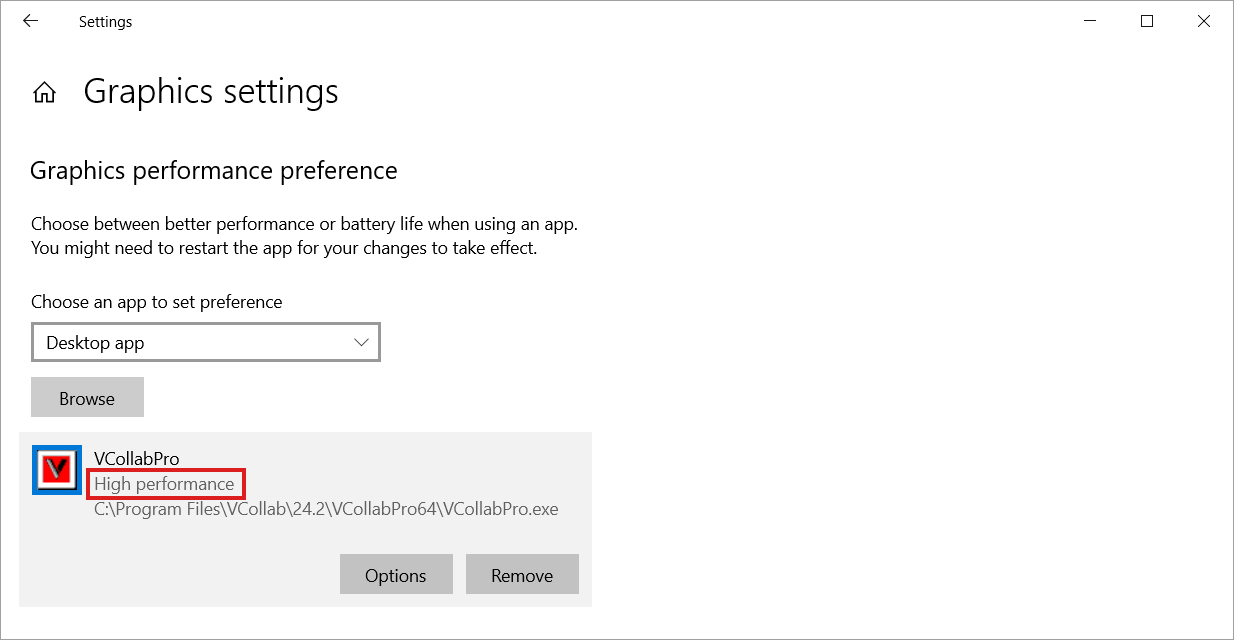
If the application is open, close it and open it again. The new setting takes effect the next time the application starts.
Verifying the GPU in use
Start the VCollab application and load a model.
Press Ctrl + Shift + Esc to open Task Manager.
On the Processes tab, right-click a column heading and select GPU engine.
Find the VCollab application in the list. The GPU engine column shows which GPU the application is using, for example
GPU 1 - 3D.
Removing the setting
To return the application to the default behavior, select it in the list of apps and click Remove.